
 As a travel agent, I spend all day helping people plan the perfect getaways—from booking dream overwater bungalows to ensuring your layovers aren’t a mad dash across the airport. But these days, there is one piece of travel tech I encourage all my clients to throw into their luggage: an Apple AirTag.
They have completely changed the peace-of-mind game, allowing you to track a lost bag down to the exact terminal. But there’s a catch. If you bought your trackers a while back and haven’t thought about them since, you might be heading for a luggage blackout.
The 1-Year Rule
According to Apple’s official product specifications, an AirTag battery is designed to last for about one year under normal daily use.
If your tracker has been sitting in a suitcase since your last big vacation, there’s a very good chance it’s running on fumes—or completely dead. The absolute last thing you want is to touch down at your destination, open up your phone to make sure your bags made the flight, and see that your tracker went dark somewhere over the Atlantic.
The good news? You don’t need to buy a new AirTag. The battery is fully replaceable, inexpensive, and takes less than a minute to swap out.
How to Check and Swap Your Battery Before You Fly
Don’t wait until you’re standing at the baggage drop to realize your tracker is dead. Add this quick check to your pre-departure routine.
1. Check the Status on Your Phone
While your iPhone will automatically push a “Low Battery” notification when power gets critically low, it’s always best to check manually before a major trip:
-
Open the Find My app on your iPhone.
-
Tap the Items tab at the bottom.
-
Select your specific luggage AirTag. If the battery is failing, a prominent banner warning will appear right beneath the item’s name.
2. Swap It Out in Under 60 Seconds
AirTags run on a standard CR2032 lithium 3-volt coin battery—the exact same kind used in most car key fobs and watches. You can grab them at any local supermarket, drugstore, or online.
1. Open the casing:Press and twist.
Hold the AirTag with the polished stainless steel battery cover facing you. Press down firmly on the cover and rotate it counterclockwise until it stops turning.
Take your fingers off the cover; it will pop up slightly. Lift the cover off and remove the dead coin cell battery.
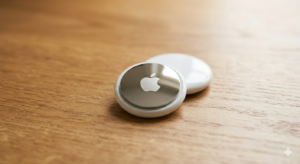
Insert the new 3-volt battery with the positive (+) side facing up toward you. Press it down firmly—you should hear a distinct, digital chime indicating the battery is successfully connected.
Replace the cover by aligning the three small tabs with the slots on the AirTag. Press down firmly and rotate the cover clockwise until it stops and locks in place.
⚠️ The Tech Warning Apple Wants You to Know: Apple officially cautions that CR2032 batteries with a bitterant coating may not work with AirTags. Many major battery brands coat their coin cells in a bitter substance to discourage children from swallowing them. However, depending on how that coating aligns with the AirTag’s internal terminals, it can act as an insulator and block the electrical current entirely.
The Fix: Look for child-safe packaging that explicitly states it is “AirTag compatible,” or stick to brands like Panasonic or Energizer where the coating won’t interfere with the contacts. If you’re in a pinch with a coated battery that won’t play the chime, tech forums widely recommend wiping the battery down with an isopropyl rubbing alcohol wipe for 30 seconds to dissolve the bitter film before popping it in.
Make checking your trackers a standard part of your packing routine, right alongside double-checking your passport expiration date. Safe travels, and may your luggage always arrive when you do!
Happy travels,
![]()
